
An open carport does a good job of keeping rain and sun off your vehicle, but it has real limits when it comes to security and storage. Enclosing a carport gives you garage-level protection without the cost of building one from scratch. This guide covers every key step of the process.
Before You Start: Key Checks
Rushing into construction without preparation is where most enclosure projects run into trouble. Cover these bases first.
Inspect the Existing Structure
-
Frame condition: Posts must be plumb, level, and free from rust or damage
-
Roof integrity: The roof must handle the added wind load that enclosed walls create
-
Foundation: The slab must be solid and level; uneven ground needs concrete work first
Reinforce the frame before adding any panels if damage is found.
Check Permits and Local Codes
Most municipalities require a permit when you enclose a carport, since adding walls changes the structural classification. Contact your local building department before starting. Key points to verify:
- Whether a permit is required for your project scope
- Setback distances from neighboring property lines
- Fire safety rules if the structure is attached to your home
- HOA restrictions on exterior modifications
Skipping this step can result in fines or removal of completed work.
Choosing Your Enclosure Materials
The material you choose affects both cost and final appearance.
Sheet Metal Panels
- Most common choice for metal carports
- Self-tapping screws attach directly to existing metal studs
- Horizontal installation requires less additional framing
- Durable, weather-resistant, and low maintenance
Wood and Plywood Siding
- Better suited to wood-framed carports
- Requires framing studs placed 16 inches apart before panels are attached
- Can be finished with drywall inside and vinyl siding on the exterior
Vinyl Siding
- Lightweight and weather-resistant
- Works well for attached carports where matching home aesthetics matters
- Requires a wooden frame as a base for panel attachment
Step-by-Step: How to Enclose a Carport
Step 1: Clear and Measure the Space
- Remove all vehicles, tools, and stored items from the area
- Clean the floor and verify the foundation is dry and level
- Measure all open sides; enclosure panels should be cut slightly smaller than carport dimensions to leave room for fasteners
Step 2: Reinforce the Frame if Needed
- Add bracing where wall panels will be anchored
- Install headers above any planned door or window openings before framing
Step 3: Frame the Walls
- Use wood or steel studs spaced 16 inches apart
- Attach a pressure-treated bottom plate along the foundation to prevent moisture damage
- Frame openings for an access door and any windows at this stage
Step 4: Install the Siding
- Start with side walls, then move to gable ends
- For metal panels, work from the bottom up, overlapping each row to prevent water infiltration
- Check alignment as you fasten each panel
Step 5: Add Insulation and Electrical
- Install insulation before sealing the interior if you plan to heat or cool the space
- Run electrical conduit and wiring while walls are open
- Add ventilation to prevent condensation buildup in enclosed metal structures
Step 6: Install Doors, Windows, and Finishes
- Fit the access door with weatherstripping to block drafts and pests
- Seal all edges and gaps thoroughly
- Paint or prime exterior surfaces for weather protection
- Add drywall, shelving, or lighting inside as needed

Cost to Enclose a Carport
Costs vary based on size, materials, and labor. General ranges to expect:
|
Project Scope |
Estimated Cost |
|
Basic metal panel enclosure |
$1,500 to $4,000 |
|
Wood framing with vinyl siding |
$4,000 to $10,000 |
|
Full conversion with electrical and insulation |
$10,000 to $24,000 |
DIY labor reduces costs considerably, but hiring professionals for electrical work and door installation is strongly recommended.
Start With the Right Carport Structure
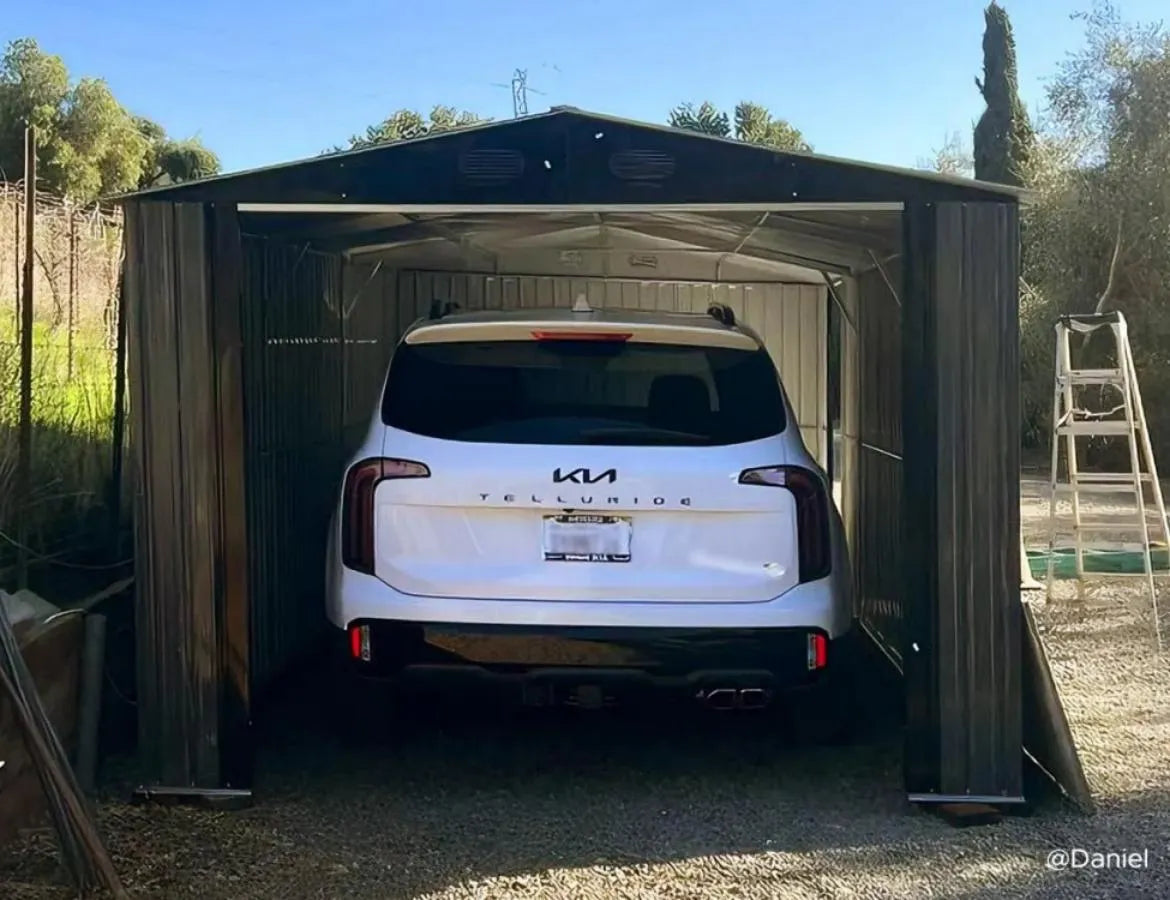
The quality of your enclosure project depends heavily on the quality of the carport you are starting with. A flimsy or undersized frame creates problems the moment wall panels and wind load are added. The SUNJOY 12x20 Metal Carport Gable Roof Gazebo is built with exactly this kind of future use in mind.
Why It Makes an Excellent Enclosure Foundation
- Heavy-duty powder-coated steel frame and roof that resists rust, UV rays, rain, and snow
- Triangular reinforcement beams on the top and sides of the main frame for structural rigidity under load
- Spacious 12x20 footprint providing 223 sq. ft. of covered area for vehicles or a workspace
- Two built-in ceiling hooks for lighting, tools, or décor
- Pre-drilled components with illustrated instructions for straightforward setup
This structure gives you a solid, weather-tested base to build from, so when you add walls and doors, the frame is already engineered for it.
Final Thoughts
Enclosing a carport delivers security, storage, and weather protection at a fraction of the cost of a new garage. The key is proper preparation: inspect the structure, pull the necessary permits, choose the right materials, and follow each step in order. Starting with a well-built carport like the SUNJOY 12x20 Metal Carport Gable Roof Gazebo makes the process more straightforward from day one.
Leave a comment
All comments are moderated before being published.
This site is protected by hCaptcha and the hCaptcha Privacy Policy and Terms of Service apply.