There are many styles of carports, how should we choose? Having carefully selected the perfect carport, how should we properly build it?
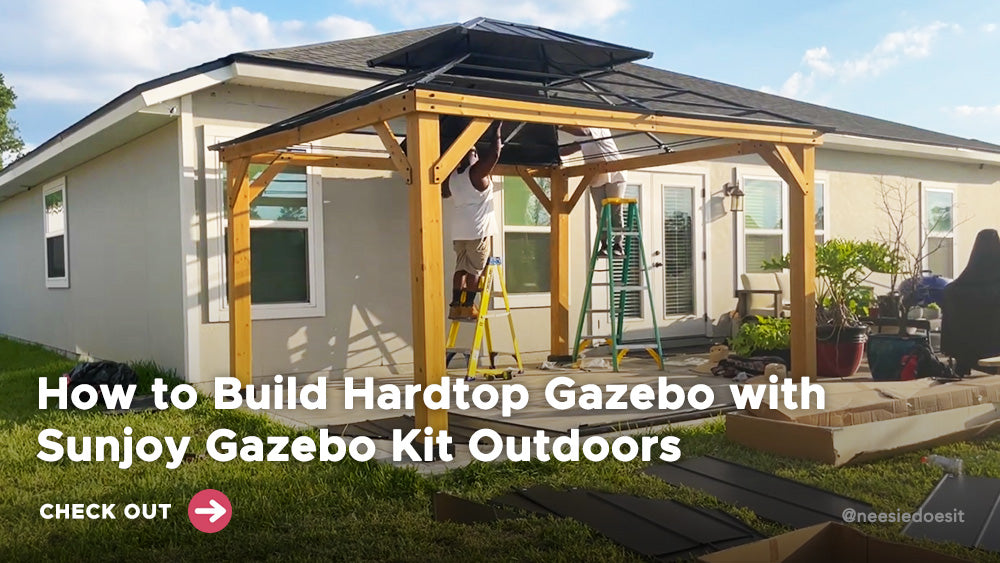
Today Sunjoy will take a classic metal carport as an example to explain its build steps step by step.👏
A suitable carport, of course, must take into account the size. You can choose the right one according to the size of your outdoors and the space you want to give to the carport. If you have a large backyard, you can choose a large-size carport, Sunjoy's current largest carport size is 14x20 ft., other sizes also have ample space that can cover small and medium-sized vehicles completely.🌿
The choice of the carport must be related to the number and size of your vehicle. You can choose a suitable size carport for your cars. Our carports are large enough to cover the vast majority of vehicles completely. We offer you a choice of three sizes to choose the right carport for your needs.🚗
Our current carport styles are generally made of steel or polycarbonate for the roof and steel or wood for the frame.
The steel roof is sturdy and durable, and the polycarbonate roof is translucent, with a high appearance and a sense of atmosphere. The steel frame is relatively hard and wear-resistant, and the wooden frame is more textured and blends into nature.🍃
We have 3 particularly classic carports, ranging from stylish translucent roof carports to very textured wood frame carports.
Roof triangle construction provides stability and has a ceiling hook provided for suspending lighting.
In both style and function, all three carports are excellent.
Come and choose your favorite carport! 🥰
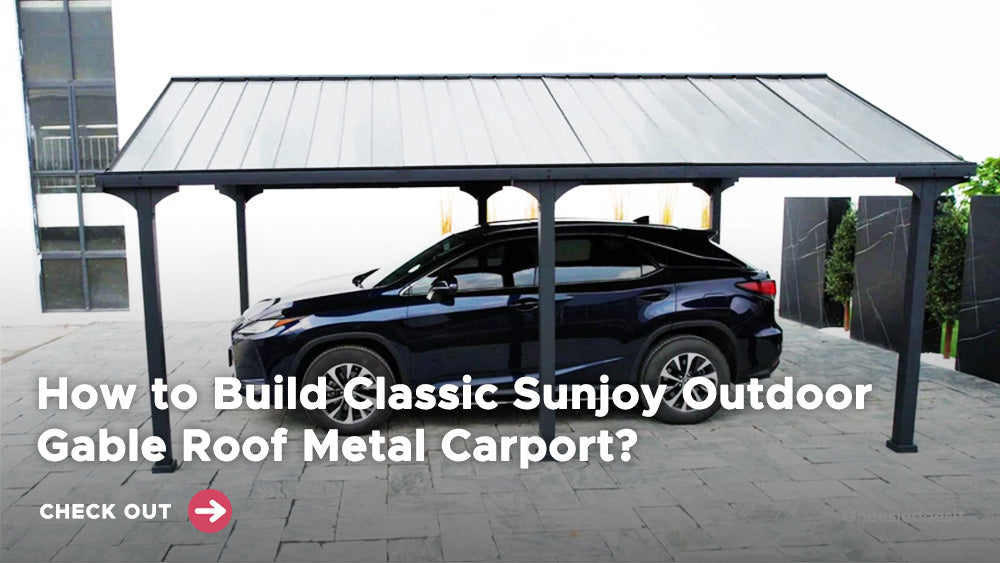
Today we will talk about this Sunjoy classic outdoor metal carport and explain how to build it.🌟
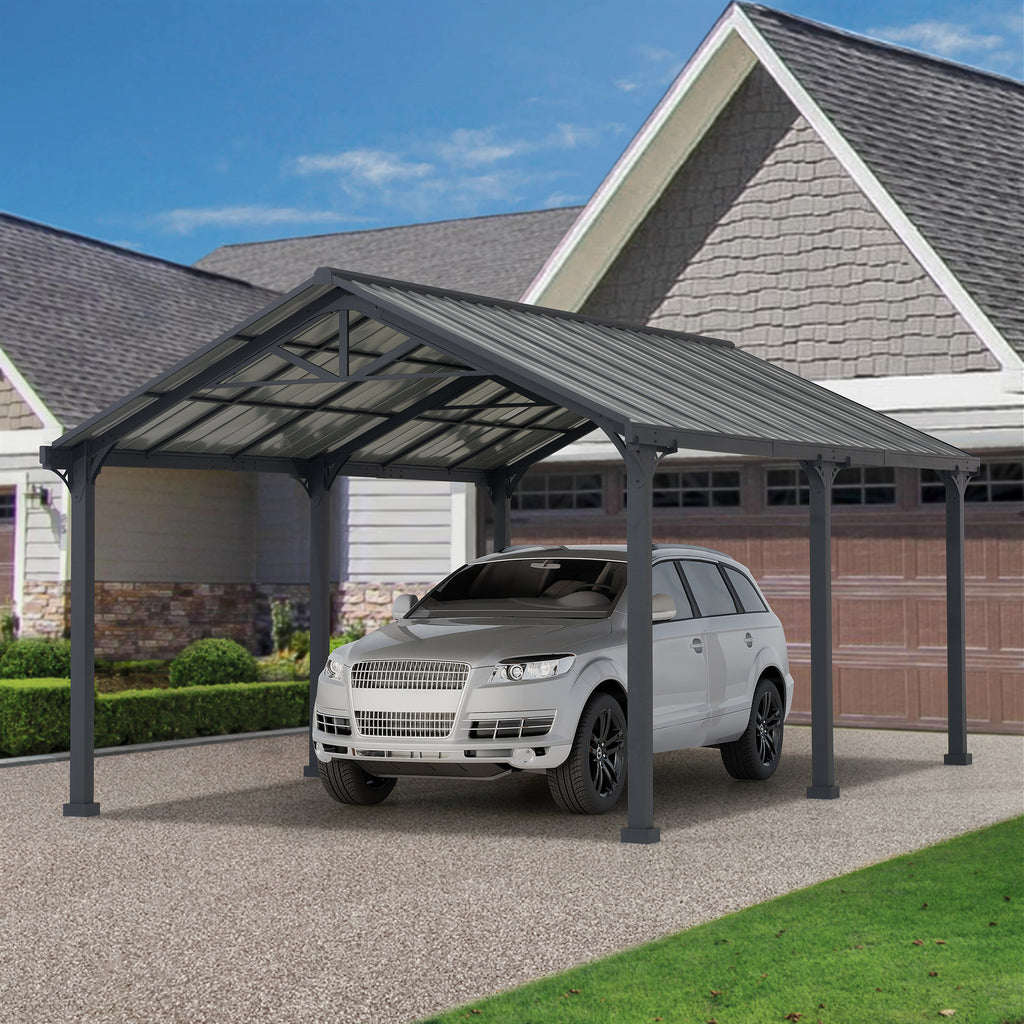
This AutoCove 12x20 Gray Steel Frame Gable Roof Metal Carport with 2 Ceiling Hooks is made from durable powder-coated light gray steel top and powder-coated dark gray steel frame, reinforced triangle construction provides stability, this structure will last the test of time and require very little maintenance. Ceiling hook provided for suspending lighting (not included), Anchoring plates with cover for easy mounting and fixing.👍🏽
Protect your vehicles, boat, trailers, etc. from damaging sun rays, hail, rain, or snow with this carport. Enjoy a refuge from the elements and use it as a gazebo for entertaining as an alternative to a garage. The design is a great complement to almost any home architecture.🚗
Not demanding on the ground, can be placed on concrete, lawn, etc.

Connect Base Cover to Post, then insert Post Base into Post. Use Bolt to connect Post Base and Post, then tighten with Wrench.
Insert herringbone Top Beam Connector into herringbone Top Beam, use Bolt to connect herringbone Top Beam Connector and herringbone Top Beam, then tighten with Wrench.
Use Bolt, Flat washer, and Nut to connect herringbone Support Frame and assembled herringbone Top Beam/Top Beam Connector, then tighten with Wrench.
Use Bolt to connect triangle Decoration Panel and herringbone Top Beam, then tighten with Wrench.
Connect herringbone Top Beam to the plug-in at the top of Post. Use Bolt to connect herringbone Top Beam and Post, then tighten with Wrench.
Insert Cross Beam Connector into Right Cross Beam, Middle Cross Beam and Left Cross Beam. Use Bolt to connect Cross Beam Connector, Right Cross Beam, and Middle Cross Beam, connect Cross Beam Connector and Middle Cross Beam, and Left Cross Beam, then tighten with Wrench.
Use Bolt to connect Right Cross Beam and Post, connect Middle Cross Beam and Post, connect Left Cross Beam and Post, then tighten with Wrench.
Connect herringbone Top Beam to the plug-in at the top of Post. Use Bolt to connect herringbone Top Beam and Post, then tighten with Wrench.
Use Bolt to connect Right Cross Beam and Cross Beam Connector, connect Left Cross Beam and Cross Beam Connector; Use Bolt to connect Right Cross Beam and Post, connect Left Cross Beam and Post, then tighten with Wrench.
Use Bolt to connect Brace 1/2 and Post, connect Brace 1/2 and Left Cross Beam, connect Brace 1/2 and Right Cross Beam, connect Brace 1/2 and Middle Cross Beam, then tighten with Wrench.
Insert Top Beam Inner Connector into Side Top Beam 1 and Middle Top Beam. Use Bolt, Flat washer, Nut to connect Top Beam Upper Connector, Top Beam Inner Connector, Top Beam Lower Connector and Side Top Beam 1, Middle Top Beam, then tighten with Wrench.
Use Bolt, Flat washer, Nut to connect Side Top Beam 1 and herringbone Top Beam, Decoration Panel, connect Middle Top Beam and herringbone Top Beam, triangle Decoration Panel, then tighten with Wrench.
Use Bolt to connect Middle Beam and assembled Side Top Beam 1/Middle Top Beam, connect Middle Beam and Right Cross Beam, connect Middle Beam and Middle Cross Beam, connect Middle Beam and Left Cross Beam, then tighten with Wrench.
Use Bolt to connect Support Tube and Middle Beam, then tighten with Wrench; Assemble the Hook to the Support Tube.
Use Bolt to connect Long Beam and Middle Beam, then tighten with Wrench.
Use Bolt to connect Short Beam and Middle Beam, then tighten with Wrench.
Use Bolt to connect Side Panel Flashing 1 and Side Top Beam 1, connect Side Panel Flashing 2 and Side Top Beam 1, connect Side Panel Flashing 1 and Left Cross Beam, connect Side Panel Flashing 2 and Right Cross Beam, then tighten with Wrench.
Use Bolt to connect Short Beam and Side Panel Flashing 1, connect Short Beam and Side Panel Flashing 2, connect Short Beam and Middle Beam, then tighten with Wrench.
Place the Top Roof Panel onto the carport roof in order, and insert the Top Roof Panel into Middle Top Beam and Middle Cross Beam.
Use Bolt to connect Middle Roof Cap and Middle Top Beam, then tighten with Wrench.
Place Top Roof Panel onto the carport roof in order, and insert Top Roof Panel into Side Top Beam 1 and Left Cross Beam.
Insert Side Roof Cap into Middle Roof Cap. Use Bolt to connect Side Roof Cap and Side Top Beam 1, then tighten with Wrench.
Place Top Roof Panel onto the carport roof in order, insert Top Roof Panel into Side Top Beam 1 and Right Cross Beam, insert Side Roof Cap into Middle Roof Cap. Use Bolt to connect Side Roof Cap and Side Top Beam 1, then tighten with Wrench.
Insert Stake into Post Base to fix the assembled carport onto the ground, and the product assembly is completed.
Metal carports are heavy, which allows them to hold still well in wind and heavy rain, as long as the installation is firm enough to withstand its forces. Ensuring that the posts will not move over time for long-term safety and stability. A good installation will make the carport stand the test longer.🥳
Let’s take a look at what to do.
This carport is installed on a soft lawn, since the lawn is softer, it is relatively easy to install.
When installing, insert Stake Φ8*180 into Post Base to fix the assembled carport onto the ground, and the product assembly is completed.
It can be installed on the grass with our matching accessories.🌼
Now comes the part that might confuse you, how to install the carport on a concrete surface. Fortunately, attaching the carport to the wood surface, paving stones, patio stones, or even concrete works the same way.
Installing a carport on concrete doesn't have to be a daunting task. This becomes very easy if you have the right equipment at the ready, like a drill, bolts, or rods. You will need to buy these accessories separately at your local hardware store.
Use Bolt down the legs to secure a carport to concrete. If you decide to use bolts, you will need a drill to help you out. Sunjoy carports already have holes in their feet, simply set up your carport, mark the point on the concrete surface where the bolt should go, and start drilling. Once done you can secure the carport to the concrete surface with the bolt. Repeat this procedure for all 4 legs. Please confirm the position you want, once drilled, it cannot be changed.👏
Do you need a carport to protect your vehicle? Use the hashtag #Sunjoylife to share your idea or opinion with us on Facebook, Twitter, Instagram, Pinterest, and Tiktok.

Leave a comment
All comments are moderated before being published.
This site is protected by hCaptcha and the hCaptcha Privacy Policy and Terms of Service apply.